Friday, October 30, 2015
What's Going on in the Classroom: Pen and Ink
I believe this project is pretty run of the mill for a foundations course, but I wanted to share the work my students accomplished. They took the skills they had learned in graphite and charcoal and ran with them in pen and ink. I also had a couple of them talk me into letting them use color in the background (or negative space) which I think was an excellent addition! I limited their reference pictures to animals, plants, or insects and of course we used copy-right free images, but other than that anything was fair game. I do have to admit that I think most of them will be happy to move on to metals and three-dimensional art work for awhile! We need a break from drawing!
Monday, October 26, 2015
What's Going on in the Classroom: Darkroom Developing
I have spent a lot of my recent posts, talking about the projects we're working on in the foundations class that I teach. Today I wanted to show some images of the first film prints my Photo 1 students have developed. This was their first experience in the darkroom alone. Some turned out great and some have room to improve, but over all I think they did well. Check out some of their photographs:
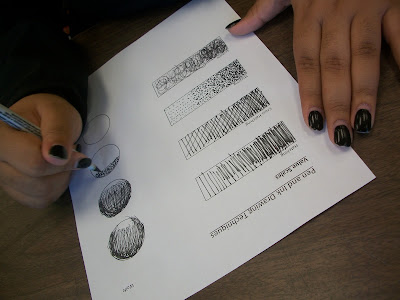
Some great images for the first time around. Also an update. Since we finished charcoal in the foundations class, we have moved on to pen and ink. Everyone loves stippling! Not! Here are the technique sheets we worked on today.
We started of making contact sheets, like mini thumbnails of our work.
Some great images for the first time around. Also an update. Since we finished charcoal in the foundations class, we have moved on to pen and ink. Everyone loves stippling! Not! Here are the technique sheets we worked on today.
Thursday, October 22, 2015
What's Going on in the Classroom: Charcoal, what a mess!
We have ventured into the messy world of charcoal! All our drawing projects so far have been using graphite. However to finish up our quarter on drawing we are using charcoal and also doing a pen and ink project (more on that later!)
Part of our curriculum asks us to deal with the idea that artists are always toeing the line between 2D and 3D. We either trying to create a 3D image on a 2D surface, or we are taking a 2D design and attempting to create a 3D piece of art. Sometimes the switch between these two ways of thinking is difficult for students. While working with charcoal, students also investigated the difference between 2D and 3D.
To start off, all students had to pick on object and do three realistic drawings of that object from different viewpoints. Realistic meaning making them look as 3D as possible. Then they had to translate those drawings into 2D designs using only shapes and positive and negative space. Here are images of those six drawings.
The next step was for students to choose their most successful 2D design of the three and draw it larger. Then the positive space was shaded in using white charcoal and the negative space was colored in using compressed black charcoal. This color scheme provides awesome contrast for a really graphic image. It was also very messy!
Monday, October 19, 2015
What's Going on in the Classroom: 2-Point Perspective Cityscape
After our spectacular journey into Surrealism through the use of 1-point perspective, I wanted to give my students a taste of 2-point perspective and what is possible when you add that second vanishing point! We did a lot of step by step at the beginning of this project, helping students to understand what different shapes will 'do' when drawing in 2-point perspective. Here's how we started making a city scape:
After the foundation of the city was laid down, students were given free reign to add details as they saw fit. We have a lot of imaginative students so you better believe that the cities were fabulous and varied.
Now we're embarking on a charcoal journey. To start, students were given a day to explore and have fun with the new medium. The goal for that day was to learn the way that charcoal worked best for them. Now we're moving forward into a charcoal project that incorporates the idea of playing with two dimensional and three dimensional space on our papers. More to come on that next post!
Tuesday, October 6, 2015
What's Going on in the Classroom: Surreal Hallway-One Point Perspective
As I mentioned last post, we are moving from value and shading into drawing things more as we see them. The first stop on that road was lessons on one-point perspective. Again, I am borrowing this idea from Patti Fields, a fellow art teacher.
Student's assignment was to draw the hallway outside our room. We discussed how to draw the most prominent parts, the floors ceiling and walls, the lockers, signs, etc... Students were then unleashed on the hallway to spend time doing observational drawing.
The next day, we talked about Surrealism. I showed students famous exemplar works by Surrealist painters and we talked about what makes art Surreal. I also showed some examples of hallways that had been made into Surreal art so that everyone had a clear picture of what was expected. Students did some brainstorming about how they would like to turn their hallway into a Surreal piece of art.
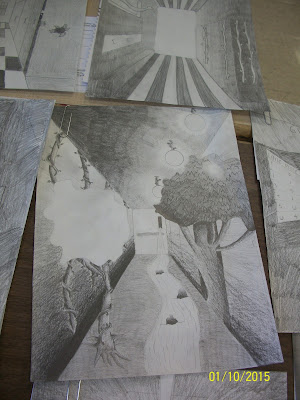
Last step was to add value. Student's identified a light source and then shaded each object or part of the hallway accordingly. Man! Were some people mad that I wasn't letting them use color! However, adding value is a skill and practice makes perfect. Check out these amazing Surreal Hallways!
Subscribe to:
Comments (Atom)


