Now that most students are done with their pendant project, we are moving on to wire sculptures. Since this is a foundations course, some of these students are experiencing sculpture for the first time since elementary school. So we have a nice long talk about 3-D vs. 2-D, building an armature and then building up mass. Students had to select an animal, draw a contour line drawing of it, form an outline out of wire and then building up the mass of the sculpture using wire. These projects are in the works but here are a couple to show you how we've been starting out.
Monday, December 14, 2015
What's Going on in the Classroom: Metal and Wire Projects
Hey all, just a quick peak as we finish up our metal pendants and begin wire sculptures. I posted here about the start of our metal pendents. Students used an acetylene torch and solder to connect one or more pieces of metal and did a ton of filing, sanding, and polishing to create some pretty cool pendants, here are just some of the results.
Sunday, December 13, 2015
A Peak Inside my Protfolio: DIY bags and the continuation of Flight
Well, I know it's been awhile, but if you're one of my teaching friends, you know that the weeks before Christmas break are hectic. Especially at the high school level, we're busting a move to get everything ready for Scholastic's Competition. More on my student's work in a later post, however; this one is about some of the work I've been doing at home.
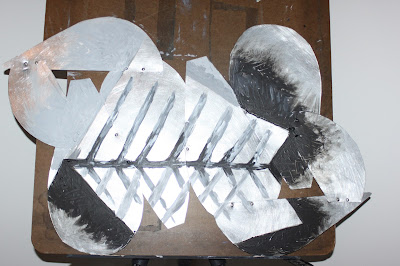
As some of you know, I was working on a series of paintings about flight, for my graduate painting class. You can read about the first three paintings in the series here. Since that post I have finished two more paintings. One on traditional canvas, and one on metal that I cut, sanded and riveted myself! I though it was important to immerse myself in the plane-making process to get a clear understanding of what I was depicting in my paintings. Let me tell you, riveting is hard! Here are some process pictures.
As some of you know, I was working on a series of paintings about flight, for my graduate painting class. You can read about the first three paintings in the series here. Since that post I have finished two more paintings. One on traditional canvas, and one on metal that I cut, sanded and riveted myself! I though it was important to immerse myself in the plane-making process to get a clear understanding of what I was depicting in my paintings. Let me tell you, riveting is hard! Here are some process pictures.
Here's the finished work, can I just say, that it's so much more powerful in person.
The piece of metal, is quite a bit different. My instructor has been pushing me to move away from technical, realistic painting. And although there is still some of that in this next piece, I do feel as if I've pushed myself. There was a lot of trial and error to get there though!
Here's the metal construction that I started with. I used sheet steel, tin snips, air compressor and rivets to put this all together.
This was my first image. And although I like it, it didn't go far enough for me.
So I thought, maybe I should add color... still not what I was looking for.
So then I sanded it down and added these shapes, which I hated. So I took it to class to get some feedback from my peers.
I just needed to refine the lines and shapes a bit more, so back to the sand paper.
Here's my finished piece. I still have some of the same lines and some color but it's more developed and I think they texture and sanded areas really bring a dimension to the piece.
Okay, okay. I know this post is going on and on, but I do have a DIY that I did this last week and some fiber art that I finally finished. That's right, the embroidered backpack is finally done. If you want to read about my long battle with the embroidery, you can read about it here. But here it is in all it's finished glory!
Of course I had to use it immediately as my purse! But I was concerned about all the various things I keep in my purse snagging on the thread on the inside. So, I just quickly made a lining panel for the front side. I also whipped up a cute little DIY pouch to keep all my junk in. I used this tutorial here and it was so super easy to follow!
Thanks for sticking with this post to the end. I love doing little projects and adding to my professional and personal portfolio with different techniques and skills. Hope you're inspired to add to yours!
Labels:
Acrylic paint,
are teacher portfolio,
art projects,
art teacher,
artwork,
DIY,
DIY backpack,
DIY makeup bag,
fiber arts,
graduate school,
paintings,
portfolio,
series of paintings,
sewing,
still life
Monday, November 30, 2015
What's Going on in the Classroom: Hand Coloring Photographs
I'm hopeful that everyone's Thanksgiving was amazing and the break was a much-needed breather from the joys of teaching. My photography students just finished experimenting with hand coloring their photographs. We used fiber-based paper instead of RC paper and students used a rigorous washing process to make sure the chemicals completely left the fiber based paper.
After the print was developed and washed students put it in a blotting book for 24 hours and then used the hot press to remove any remaining moisture. Then they were ready to color! We practiced using water colors and colored pencils and I encouraged students to chose one area that would complement their idea or concepts with the photo that they took. Here are a couple of examples, these are black and white film prints that have been hand colored:
After the print was developed and washed students put it in a blotting book for 24 hours and then used the hot press to remove any remaining moisture. Then they were ready to color! We practiced using water colors and colored pencils and I encouraged students to chose one area that would complement their idea or concepts with the photo that they took. Here are a couple of examples, these are black and white film prints that have been hand colored:
Tuesday, November 17, 2015
What's Going on in the Classroom: Jewelry Making!
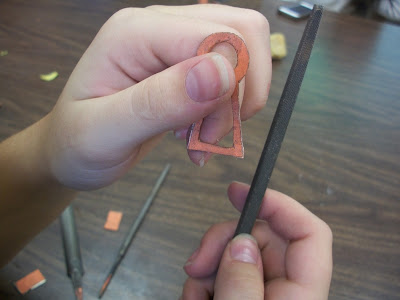
So my little foundations kids are all grown up and making jewelry! They are making a metal pendent where they are required to practice their skills in sawing with a jeweler's saw, solder with an acetylene torch, use files, and polishing using tripoli and rouge! We started with paper models that students rubber cemented onto the metal of their choice. Now we've been doing lots and lots of sawing and filing. I pretty much have a continual headache from all the noise. But we should be done soon, my hope is the first group of students will be ready to solder tomorrow or Thursday! For now take a look at some of our projects as we start...
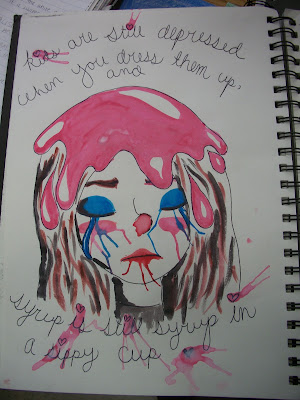
Also, students in my foundations class turn in two sketchbook assignments a quarter. This last one, had some particularly cool results. Their assignment was to illustrate their favorite (school-appropriate) song lyrics. Below are some awesome examples of the interesting work students completed.
Subscribe to:
Comments (Atom)


