Showing posts with label Lines. Show all posts

Wednesday, November 5, 2014

Adaptive Art Project

For this post, I wanted to share a project I am doing with my CI and ASD classes. I have experience working with special education students before, but in my new school, I have a class of 13 Cognitively Impaired students and also a smaller class of Autism Spectrum Disorder. This is the first time I've really had to get down and dirty with planning for students who have special needs. We started with a lot of cutting and pasting, my goal is to have students really work on those fine motors skills that they are struggling to develop. These skills are necessary for life as well as art class.
After students improved at cutting and pasting, we added painting to our projects. Now students paint and then use their painted paper to cut and paste and create a piece of artwork. The project below was focused on getting students to control their brush enough to paint straight lines across the page.

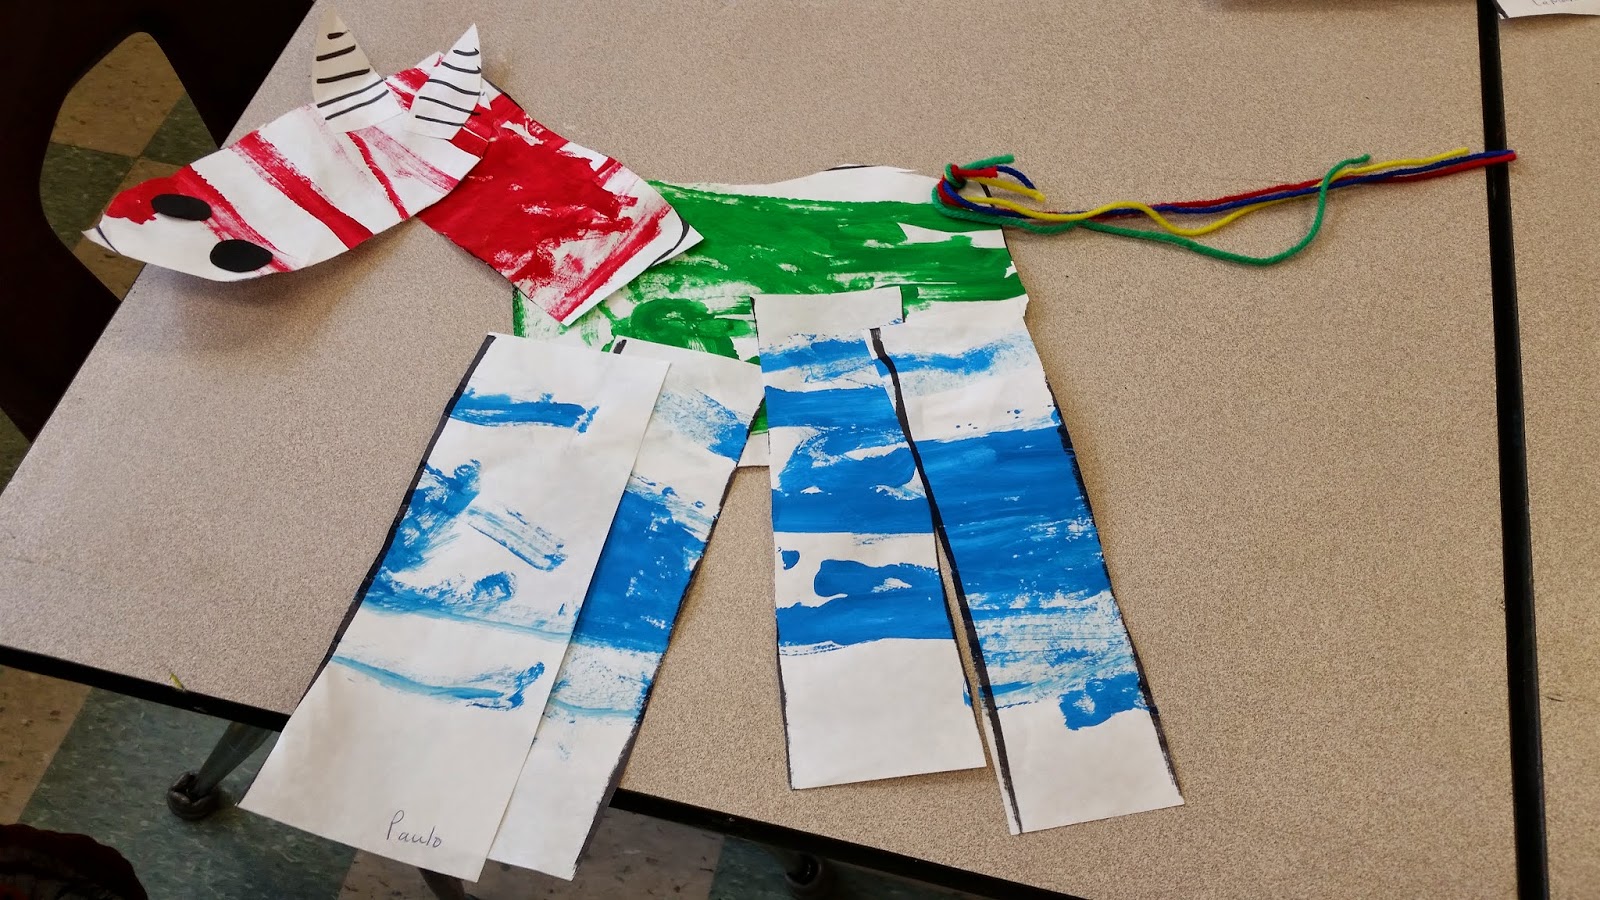
During the first class, we talked about all the painting we had done. I chatted with students about how we were going to be painting lines. We all practiced moving our arms in a line in the air and then with an empty paint brush over the table so that students had the correct motion down. Then students were given a piece of white paper and red paint only. They painted lines across the paper just using red paint. Then they put their paint brushes into water and got a new paint brush, a new piece of paper and some green paint on their paint tray. Make sure to pass out the paint brushes last so that they don't put them in the red paint on accident. Lastly, give them a new paint brush, blue paint and a new piece of paper. If you have some students who are more advanced, you can have them paint stripes with two different colors for each paper and use a pattern as seen in the first picture below.

For the next class, pre drawn legs, body, neck, and head on to the different striped paper. Now students can begin class by cutting out each piece. Have the students make a pile of their pieces as they cut. After all the pieces are cut out, have glue handy to allow the students to glue the pieces together. I used the glue to dot things and make it easier for the students.

Lastly, and this can be done during the second class as well, I had students glue on small black circles and blacked striped ears that I cut out before hand.

The students loved this project and they turned out awesome! I added a hole punched, yarn tail on each one after the second class was over. I think this project was great for building fine motor skills and helping students to paint in a controlled way. I love how much the students are improving and learning new skills!


Thursday, October 23, 2014

DIY Ugly Doll and an Update on Some Projects

Hello all!
I think I've finally changed my name with every known institution in the universe. Now that I have my prep time back, I'm hoping to blog weekly again!
In this post, I want to post a quick update on the latest kinder project and then talk about how we're doing a sewing project with the 4th graders! We're all making our own Ugly Dolls!! Which are so stinking amazing and we've just started. Okay but before I start gushing about that...

The Kinders! When I last posted, they were working on drawing faces using their knowledge of line and shape. We used pencil first and then traced over it with black marker. We had a chat about facial expressions and each student picked a different expression to use. Here are what they looked like before we colored them:


After that, we got out the oil pastels and talked about the correct way to use them. We also discussed how we wanted to be sure to get the right color before we started coloring, especially when coloring the face! We came up with a neat trick of testing the color on the back of the paper to make sure it was the right one. I had them color the whole thing; skin, hair, eyes, shirt, and background. They turned out so awesome and expressive! Check them out!


Now on to the very exciting 4th grade sewing projects. Ugly Dolls were designed by David Horvath and his wife Sun-Min Kim.to see their homepage, click here. What I love most about the Ugly Dolls is the message they preach which is: "...we should be celebrating that which makes us different, never hiding the twists or turns which make us who we are, inside and out." What a great message for our kids!!!

We started by looking at examples and then we went to work drawing a pattern for our own Ugly Doll using construction paper. Students were encouraged to be creative. But I also warned them that very tiny appendages etc. would be hard to cut out and sew and maybe they would want to stay away from them. The pattern was then cut out and pinned to a piece of felt that the student chose. They traced around their pattern with a pencil and then came back to me to have the pattern moved so that the could trace it again. They cut those identically shapes out to make the back and front of their Ugly Doll!


Now we're working on attaching any features or accessories to the front side of the Ugly Doll. Although it's taking them awhile to figure it out, the kids love working with their hands and creating something like this. Look at how awesome they look so far and we've just started! Stay tuned for more updates!


Wednesday, April 2, 2014

1st Grade Lizard Sculptures

Whenever I get a chance to make three dimensional art with the kids and it's not clay, I get excited! I originally saw this project here, but I've also seen it in many other places on the internet and I have wanted to try it for awhile. Well we finally did it and then turned out great! The 1st grade students all made these stunning lizard sculptures!

On the first day we did some talking about lizards. The students shared what they already knew and then I had a power point presentation to talk to the kids about lizards and their habitats and what they eat etc... then each student got a piece of construction paper and decorated the whole thing with lines and shapes and patterns.


 When we picked back up again, the students had time to finish decorating their paper and then we went through step by step how to fold the paper so that each lizard had the right creases for cutting later. It took the whole class, because students really needed help with some of the folding.


On the last day, we cut our lizard papers to create a triangle for taping together. Before taping though the kids had to cut slits in the back of the lizard. These slits will give it the slinky lizard-like effect that they are looking for. Then we taped them together and the students had the rest of the class to cut out arms, legs, a head, and tongue and decorate as they saw fit. What I love is how awesome they all look hanging up, just like real lizards crawling around on the walls!

Monday, September 23, 2013

Lines, Lines, and More Lines!!

All the grades begin the year talking about line. When talking about fundamental elements of creating art, line is about as basic as you can get! The lessons on line range in difficulty from just making single strips on line (Kindergarten), to using line to create a paper sculpture with one-point perspective (4th Grade). For this post, I wanted to highlight the second grade project. We talked about contour line and making that line continuous. We made it into a game where we tried so hard not to pick up our markers! At first kids were being silly, but after we practiced a couple of times, it was amazing to see what students observed and were able to draw! I have such good observers in second grade! To warm up we practiced drawing items in the classroom using continuous contour lines.

Then we went outside and did two drawings of three different plants also using continuous contour lines. Students chose their favorite of the two drawings.


After students made a selection, I drew two circles on their work in interesting places; one large and one small. We talked about coloring in those circles because they were our special 'color circles'. The colors of the plants and the backgrounds were only visible in those circles. The students were allowed to use whatever colors they wanted and some of the pieces are quite colorful. We spent some time talking about using colored pencils and how going over an area more than one time would give them a nice dark color.


Finally I had students tell me how to crop their picture. I cut off those areas using the paper cutter (I cut not the students!). This was a beginning of thinking about composition for them (we'll come back to that later) Overall I think it turned out well and I'm excited that the kids are already establishing good observation skills this early in the year. It's definitely something they will be using all year in art!