Showing posts with label oil pastels. Show all posts

Monday, March 27, 2017

What's Going on in the Classroom: Acrylic Painting and Mixed Media Triptychs

I know it's been awhile since my last blog post. All I can say is that our school's art show has finally come and gone and that is my excuse for taking up all my time and keeping me away from this here blog!
We have been working on many different things in our foundations class, but here are the most recent! An acrylic portrait and a mixed media triptych. These two pieces gave my students experiences with acrylic, chalk pastels, oil pastels, and colored pencils. They also studied different color schemes and coloring mixing during these assignments.
With all that in mind, check out these examples:


Tuesday, February 23, 2016

What's Going on in the Classroom- Mixed Media Paintings

Have I mentioned that I love our painting unit? Not only are students sitting quietly and working hard, but they are producing some amazing images! After creating a watercolor composition, we moved into mixed media pieces. For this piece I limited the subject matter a little bit. Each student had to incorporate hand into their mixed media composition. That hand had to be interacting with an object or item. So it was somewhat limited, but the object or item and how the hand interacts with it is up to the student to decide. We spent some time taking our own reference pictures of hands with objects and then we practiced how to draw a hand. I made up a little worksheet to get them started, it looks something like this...


After this basic intro to figure drawing, we talked about how to draw the different hand positions that each student wanted to use. This was mostly done individually between myself and each student. The steps after this were to draw the hand and object lightly with pencil on illustration board and then do light watercolor washes of basic colors to fill in the image. Then student could the choose to use oil pastels, chalk pastels, and/or colored pencils to had shading (depth) and details to their image. Here is what we have so far... we're spending the rest of the week on it as well so these aren't quite done yet.

Practice drawings and sketching out the final image


Finally starting to do some painting!


Thursday, February 5, 2015

Learning about Asian Art

All my classes are venturing in to the realm of art from other cultures. It's so interesting to hear the dialogue and have discussions about student's thoughts on this art. Some art from other places in the world is so different than what we typically think of as art. It's fun to learn the differences and also to learn about what art looked like in ancient times.

First grade students learn about art from ancient Asian and we are smack dab in the middle of all that learning. We talked first about the art of ancient Japan and we learned about Gyotaku which is the art of fish printing. There's a great video here that talks about where the tradition came from. We used rubber fish and painted on them with tempera paint. Then placed paper of top and rubbed them. During the next class, students glued their piece to a colorful background and decorated the border. Then we learned how to write our names in Japanese and the students signed their name with red paint, just like a traditional Han or Hanko stamp.


To explore the ancient art of Asian even further, we moved into talking about China. We talked about the emperors and how their families would rule for years and their last names were very famous. We talked specifically about the Ming family and all the contributions they made to China, including the Great Wall and Ming Vases. Our project was to draw, color and decorate three Ming Vases. Students drew a small, medium, and large vase. Then we colored them in using only blue oil pastel and then painted over them using white tempera paint. Because of course, Ming Vases are all blue and white! Then students used pointy sticks to etch out designs through the white paint, down to the blue oil pastel. They cut out their finished vases and glued them onto pink paper. During our last class, we painted black bamboo shoots coming out of the Ming Vases and then they wrote their names in Chinese using Sharpie markers. The results are awesome! We loved learning about Asian art!


Friday, December 19, 2014

Feelings and Color

In our art curriculum, we are required to talk about showing feeling through color. I love this concept! The kids really latch onto it and it makes sense to them. For this project, we had a conversation about how different colors can make you feel or how we associated different colors with different feelings. We made sure to talk about how people can think about colors differently and perhaps some colors can show more than one feeling. Then I showed them examples of paintings of musical instruments. We followed that up with some good old graphite drawing! Pictures of musical instruments were passed out and students picked one to use as inspiration for their drawing.


As you can see, we have some amazing artists in our fourth grade classes! Then we moved on to the part of the project that I think makes it so interesting and exciting for kids. The students had to pick out a song, any song as long as it was school appropriate. Then they listened to it and decided what feelings the song made them feel. I had the kids do this as homework, I didn't want to have to listen to all those songs!
The kids came back with songs and the feelings that those songs inspired and we worked through what colors they should use. They loved this process, they were so geeked to choose a song and decided how to represent the feelings with color.

We broke out the watercolor paints and got to work after a brief talk about where to place color so that they instrument didn't become part of the background and it was really the focal point, and stood out, etc...


Most students finished the background in the first class, some even finished the background and the instrument. For those that had both done, the next step was to highlight the instrument even more. We used oil pastels on the instrument only, to make it pop out of the background. We talked about many ways to do that (coloring it all in, using designs and patterns, outlining etc..) 
What I like most about the finished products is that the effects are so varied, but you can tell that there is real feeling behind the colors and the way these pieces were painted.


Thursday, October 23, 2014

DIY Ugly Doll and an Update on Some Projects

Hello all!
I think I've finally changed my name with every known institution in the universe. Now that I have my prep time back, I'm hoping to blog weekly again!
In this post, I want to post a quick update on the latest kinder project and then talk about how we're doing a sewing project with the 4th graders! We're all making our own Ugly Dolls!! Which are so stinking amazing and we've just started. Okay but before I start gushing about that...

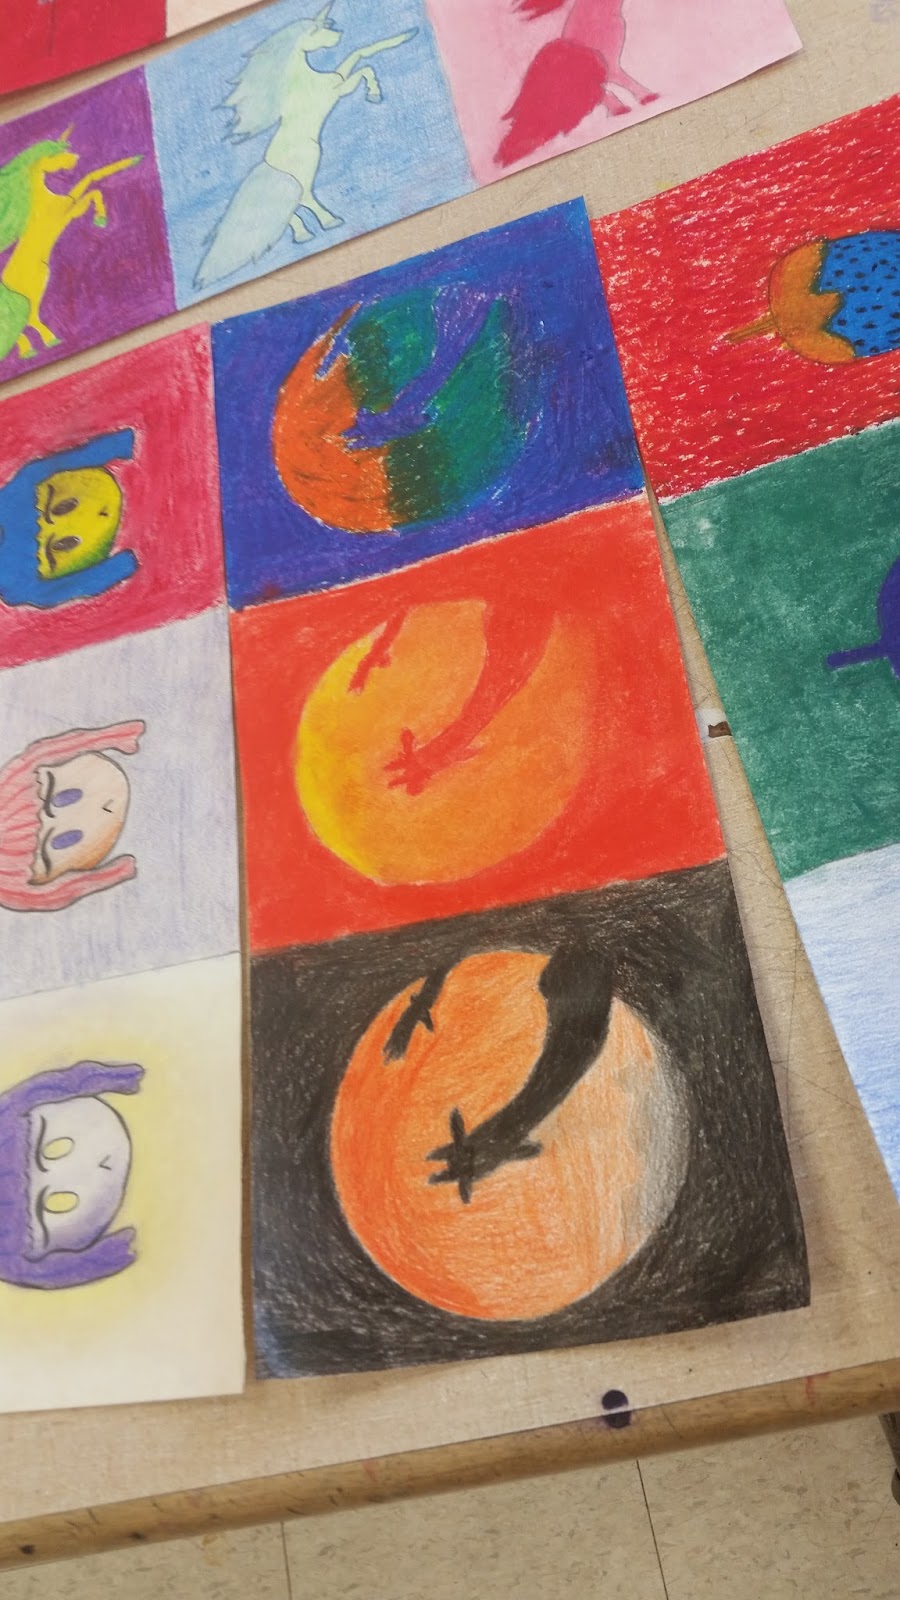
The Kinders! When I last posted, they were working on drawing faces using their knowledge of line and shape. We used pencil first and then traced over it with black marker. We had a chat about facial expressions and each student picked a different expression to use. Here are what they looked like before we colored them:


After that, we got out the oil pastels and talked about the correct way to use them. We also discussed how we wanted to be sure to get the right color before we started coloring, especially when coloring the face! We came up with a neat trick of testing the color on the back of the paper to make sure it was the right one. I had them color the whole thing; skin, hair, eyes, shirt, and background. They turned out so awesome and expressive! Check them out!


Now on to the very exciting 4th grade sewing projects. Ugly Dolls were designed by David Horvath and his wife Sun-Min Kim.to see their homepage, click here. What I love most about the Ugly Dolls is the message they preach which is: "...we should be celebrating that which makes us different, never hiding the twists or turns which make us who we are, inside and out." What a great message for our kids!!!

We started by looking at examples and then we went to work drawing a pattern for our own Ugly Doll using construction paper. Students were encouraged to be creative. But I also warned them that very tiny appendages etc. would be hard to cut out and sew and maybe they would want to stay away from them. The pattern was then cut out and pinned to a piece of felt that the student chose. They traced around their pattern with a pencil and then came back to me to have the pattern moved so that the could trace it again. They cut those identically shapes out to make the back and front of their Ugly Doll!


Now we're working on attaching any features or accessories to the front side of the Ugly Doll. Although it's taking them awhile to figure it out, the kids love working with their hands and creating something like this. Look at how awesome they look so far and we've just started! Stay tuned for more updates!